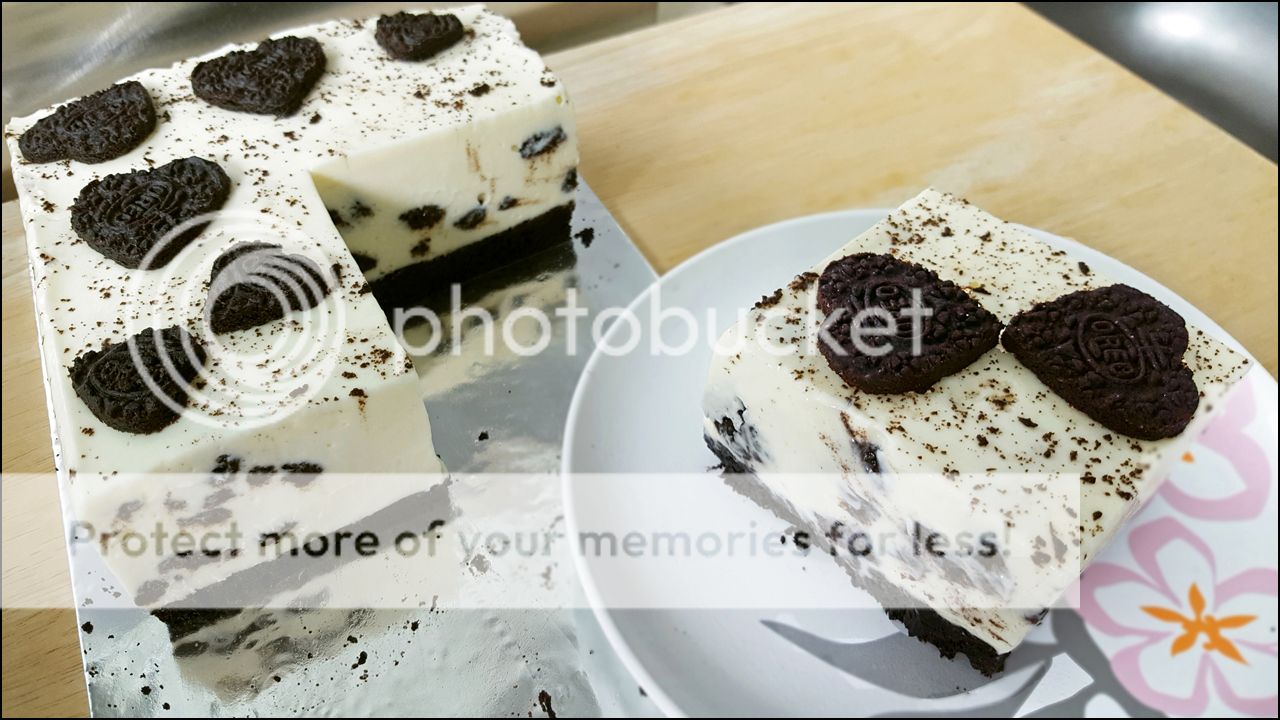
There're four ingredients in my no-bake cheesecake filling: yogurt, cream cheese, icing sugar, and gelatine.
There's no cream in the recipe.
Why not?
Because cream cheese plus cream is too heavy for the hot, humid weather in Singapore.
Instead of cream, I use natural yogurt. It's creamy but it has less than 10% of the fat in cream.
Natural yogurt is quite sour. A fair bit of sugar is needed to balance the sourness. I use icing sugar because it melts easily.
Cheesecake filling made without whipped cream needs some gelatine. There should be just enough to set the liquid ingredients. Too much gelatine would make the filling lose its creaminess and turn into pudding.
The amount of water in the filling also affects how firmly it sets. My recipe uses set yogurt. Thin, pourable yogurt would make the filling too soft because it has more water.
Cream cheese turns watery when it's mixed too much. The change is irreversible.
Watery cream cheese would make the filling less firm. Overmixing can happen in seconds if you use a food processor. But it's unlikely if you mix manually.
There're two types of cream cheese: block and spreadable. Block is firmer; spreadable is softer. This recipe works with block cream cheese. It's mixed till smooth without losing its firm consistency.
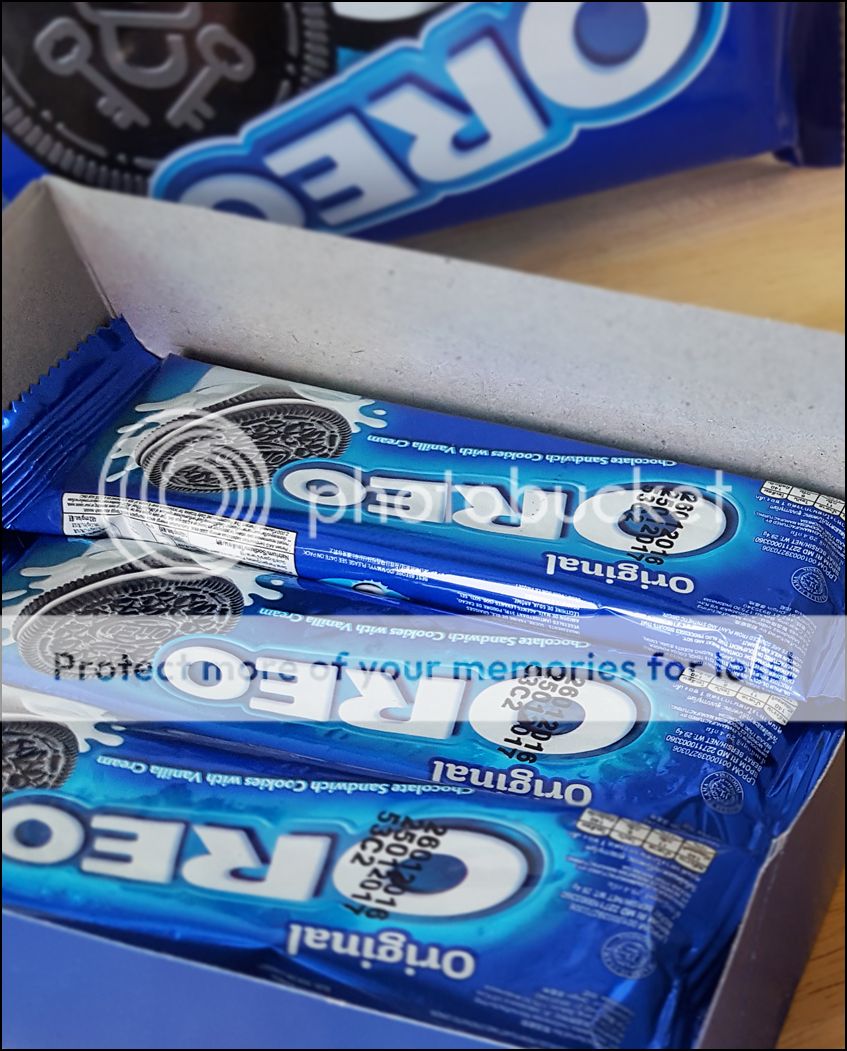
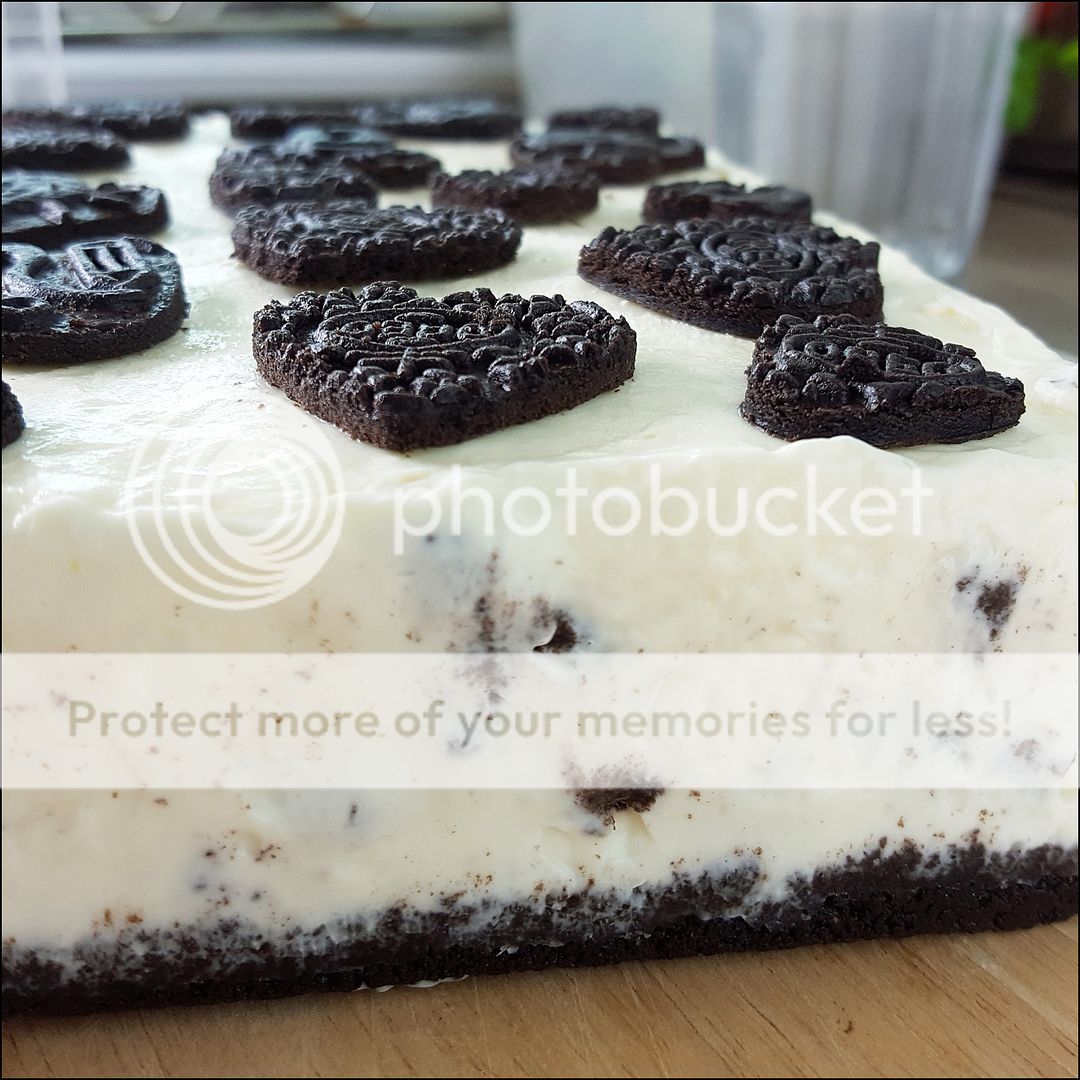
There're broken Oreo pieces in my cheesecake. I scatter the cookies between 3 layers of cream cheese mixture.
The cream cheese mixture should be thick enough to stop the cookies from sinking. But it may not be if the weather is hot, or if the cream cheese is overmixed.
What to do if the mixture is too thin? Chill it before assembling the cheesecake. When it cools down in the fridge, it thickens up nicely.
What's the right consistency? If the cream cheese mixture is level – like water – after it's poured, it's too thin. If it isn't level, but it is after you shake it, that's just right.
There're air bubbles in the cream cheese mixture. They rise to the surface and leave pockmarks on the cake when the consistency is too thin. That's another reason for getting the cream cheese mixture thick.
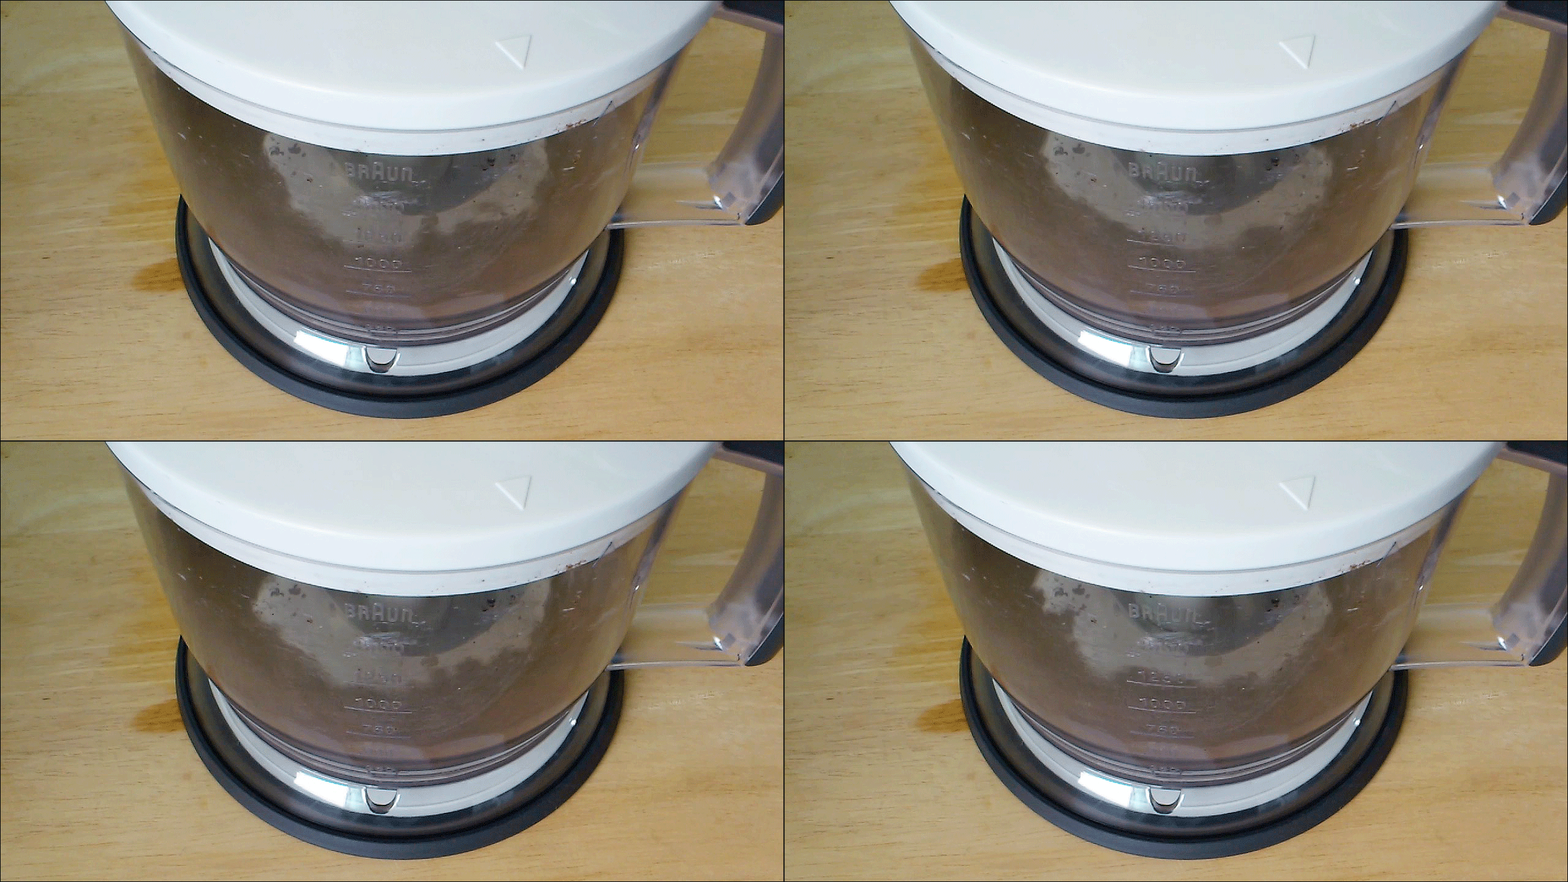
Cheesecake crust is made with cookie crumbs and butter. Some people melt their butter before whizzing it with cookies in a food processor. That's not necessary at all. Food processors can pulverise solid butter in seconds. Melt the butter only if you're crushing and mixing by hand.
Using a food processor speeds things up. Doing everything manually, as I show in my video, takes longer but it's hardly hard labour. I don't break a sweat making cheesecake by hand.
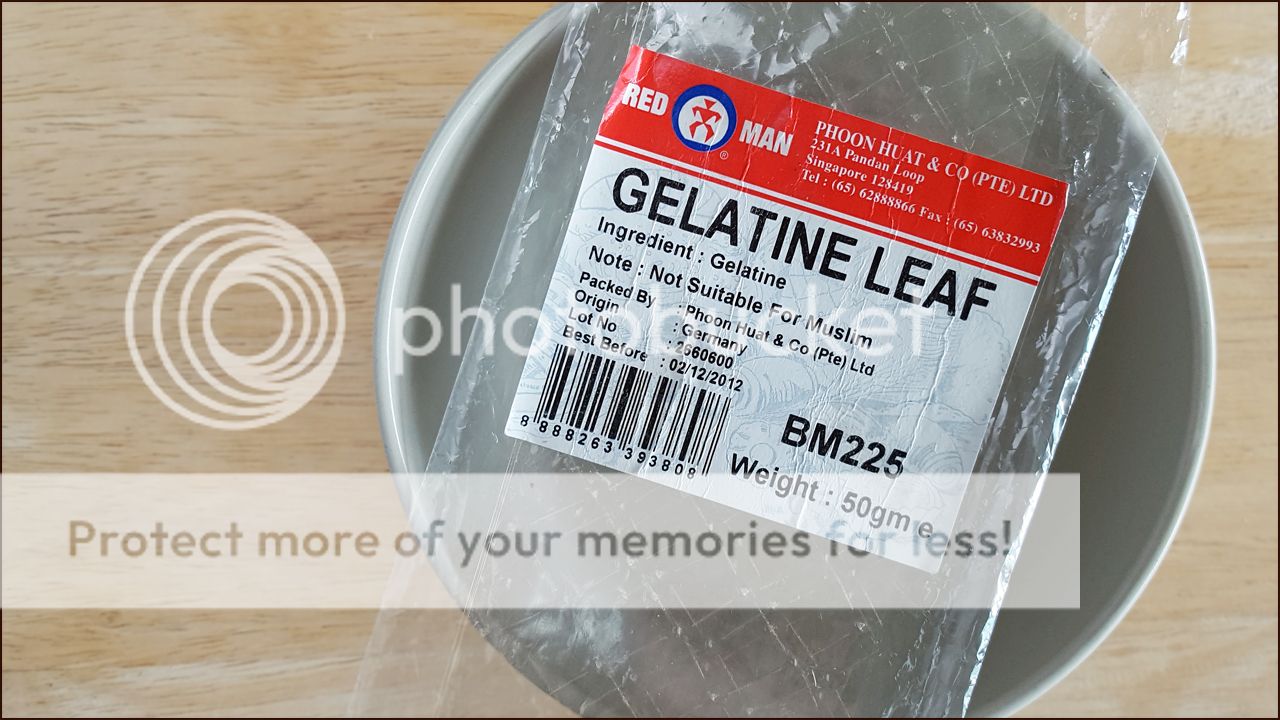
20 September 2016 Update All gelatines have a Bloom number to indicate their gel strength, clarity and taste. Gelatines with a low number give a softer set, they're murky, and they taste awful. Those with a high number give a firmer set. And they're almost transparent, and almost tasteless.
The amount of gelatine powder for replacing 3 gelatine leaves varies with the powder's Bloom number:
Bloom 125-155: 9.9 g (3 tsp) Bloom 160-180: 7.5 g (21/3 tsp) Bloom 190-225: 6.0 g (13/4 tsp) Bloom 235-265: 5.1 g (11/2 tsp)
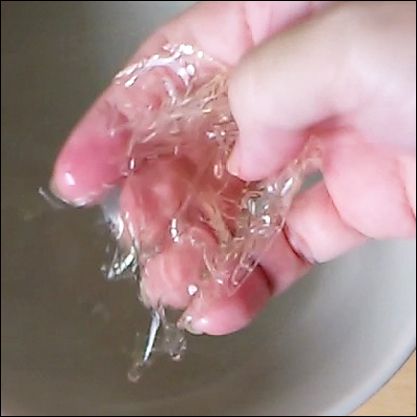
To bloom gelatine powder, put it in a bowl and sprinkle with just enough room temperature water to wet it thoroughly. The powder to water ratio is 1:3 by weight, or 1:2 by volume. Once wet, the gelatine powder may be melted in a hot water bath, as for gelatine leaves in the recipe below.
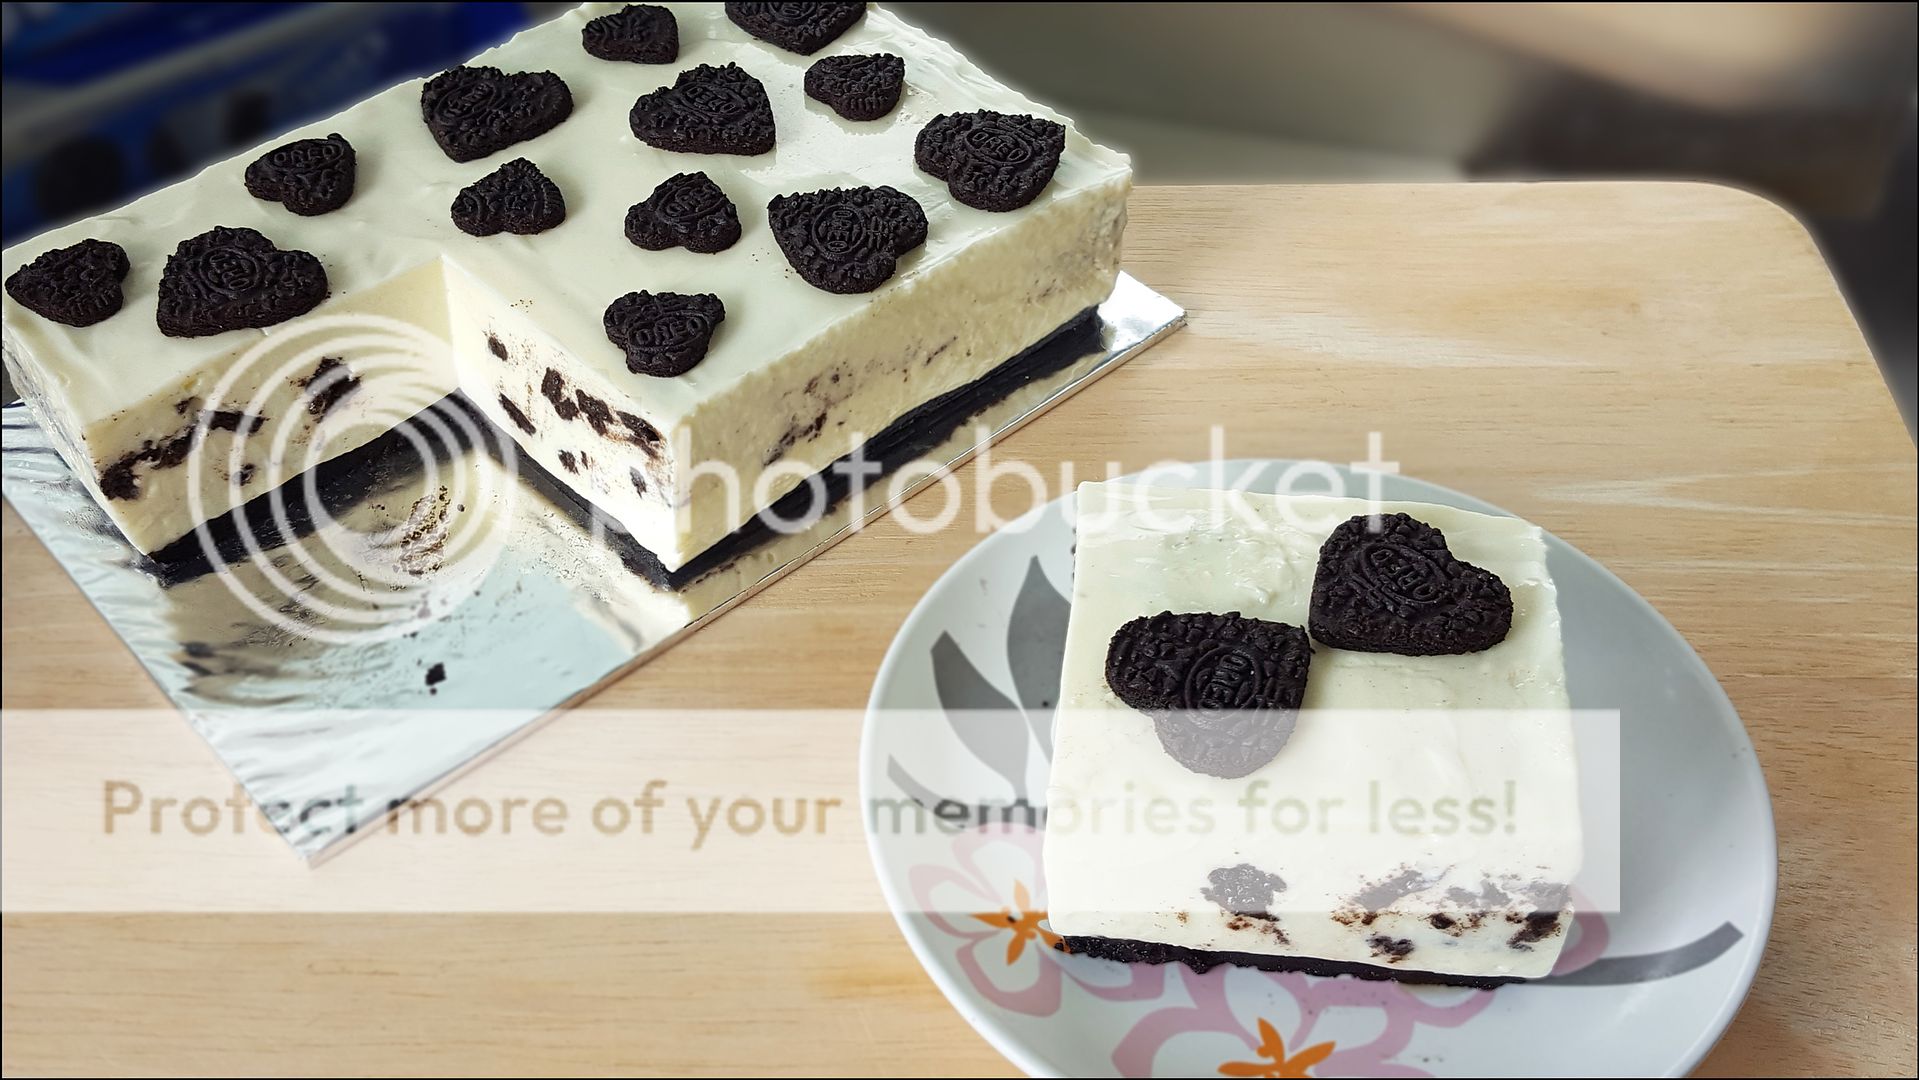
NO-BAKE OREO CHEESECAKE (免烤奥利奥芝士蛋糕)
(Recipe for one 8" x 5" x 2" cake)
中文版食谱 Crust 18 Oreos without icing (132 g) 40 g unsalted butter, melted and cool
Cutouts 8.5 Oreos without icing, soft
Filling 3 gelatine leaves (read update above if using gelatine powder) 500 g full-fat natural set yogurt 250 g full-fat block cream cheese 120 g icing sugar, sift if lumpy 2.5 Oreos without icing
break into small pieces, add scraps from cutouts or another 6.5 Oreos
All ingredients, utensils and tools should be at room temperature unless otherwise stated.
1) Line 8" x 5" x 2" cake pan with 2 sheets of plastic forming "t" shape, leaving overhang of 1".
2) To make crust, place cookies in plastic bag. Bash into fine crumbs. Add butter. Mix thoroughly. Pour mixture into cake pan. Spread evenly. Press hard so that crumbs are compact. Refrigerate.
3) To make cutouts, cut cookies with 3 cm and 2 cm heart-shaped cutters.
4) To make filling, soak gelatine in ice water till just soft, 4-5 minutes. Squeeze hard to remove excess water. Place in bowl. Place bowl in freshly boiled water till gelatine is melted, about 5 minutes.
5) Add 2-3 tbsp yogurt to melted gelatine. Whisk till even and smooth. Transfer to mixing bowl. Add remaining yogurt. Whisk till even and smooth.
6) Beat cream cheese till half smooth. Add icing sugar. Beat till just even and smooth. Add about 1/4 of yogurt mixture. Whisk till just smooth. Add remaining yogurt mixture. Whisk till just even. Taste and add more sugar if you like. Scrape down thoroughly and mix through.
7) If necessary, chill cream cheese mixture till consistency is like softly whipped cream.
8) Pour almost 1/3 of cream cheese mixture into cake pan. Sprinkle with half of cookies. Repeat layering as before. Finish with layer of cream cheese mixture. Bang cake pan against worktop 3-4 times. Cover and refrigerate till filling is set, about 8 hours. Keep chilled till serving time.
9) To serve, remove cake from pan. Discard plastic lining. Transfer cake to cake board. Decorate with cutouts. Cut with chef's knife, wiping knife clean after each cut.
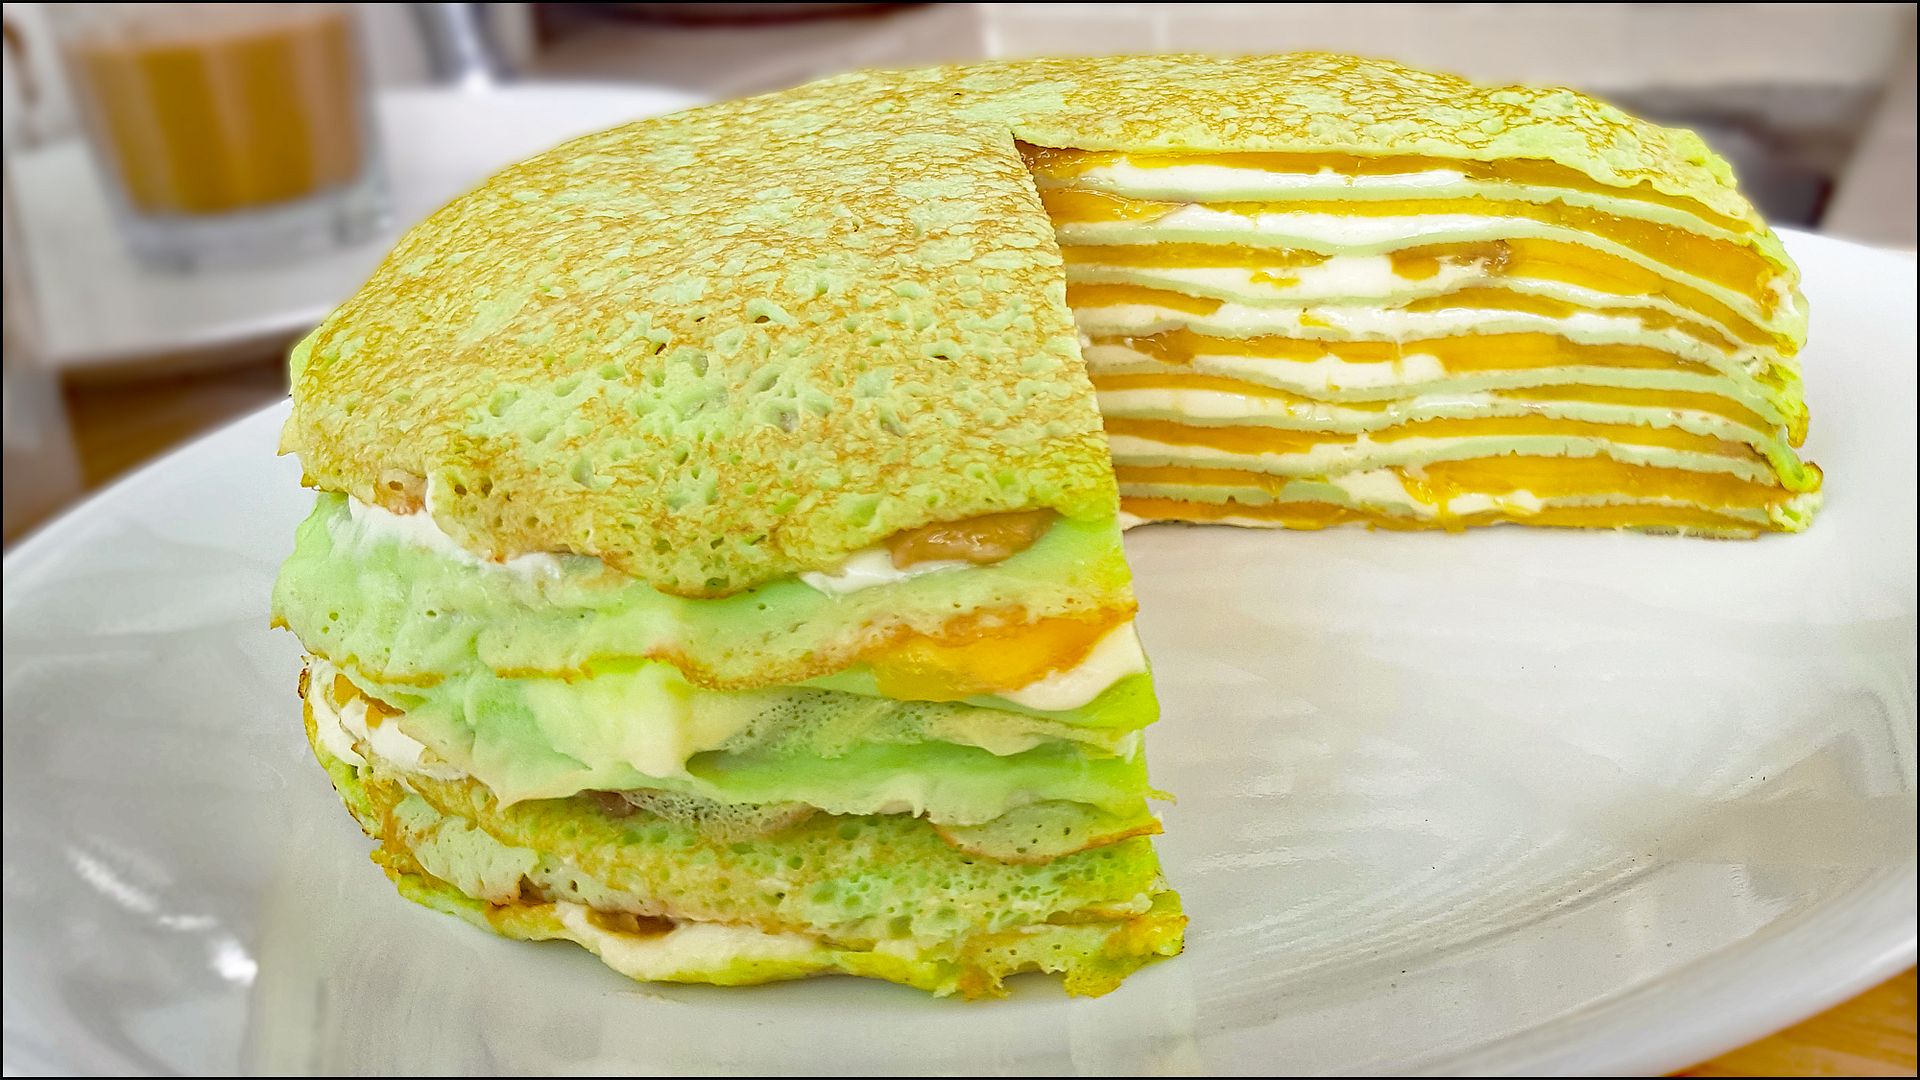
Crepes may be tough and rubbery. Or they may be soft and delicate, that they fall apart in the pan when you flip them.
What makes good crepes good, and bad crepes bad?
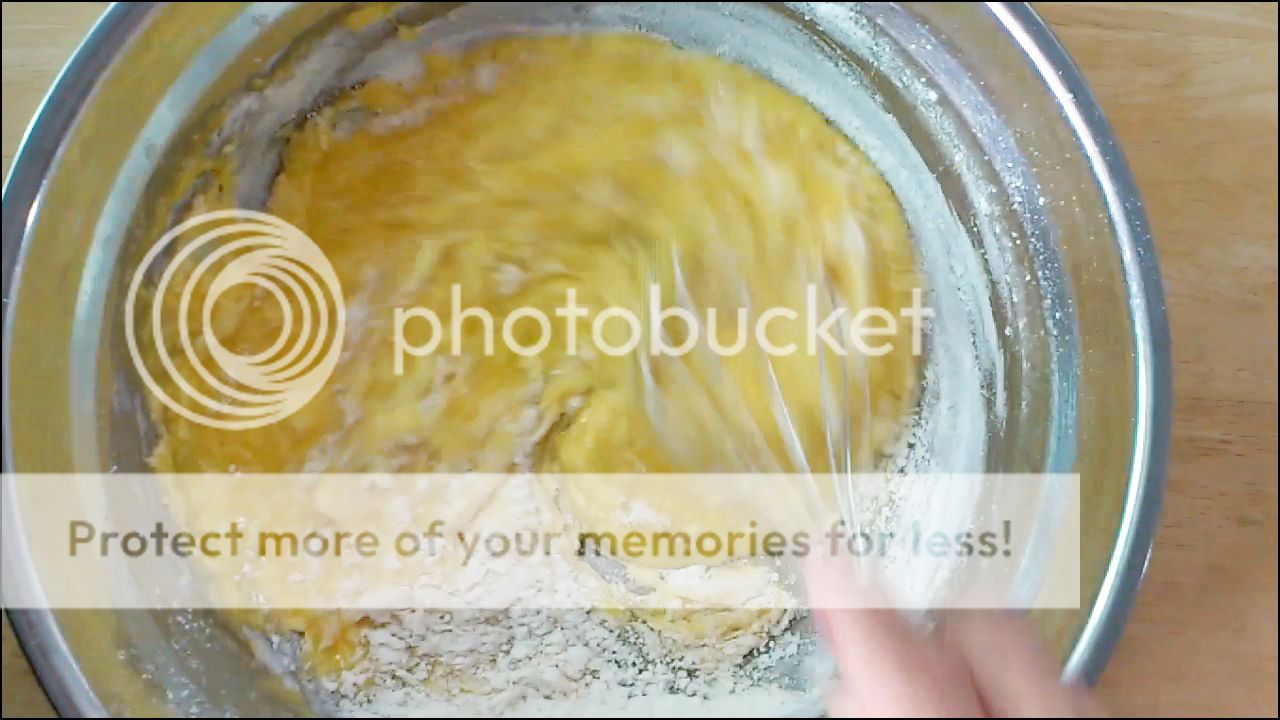
Gluten. Batter with too much gluten makes rubbery crepes. Batter with too little gluten makes overly delicate crepes that tear easily. Making good crepes is about getting the right amount of gluten. Once you nail that, you win 50% of the battle.
What's the basic building block for gluten? Flour protein. Too much protein would create too much gluten, and vice versa. The ratio of flour to other ingredients is crucial. And so is the type of flour. Some flours have more protein; some have less.
The amount of oil and egg yolk in the batter is also important. Why? Because fat reduces gluten formation, so it has a big impact on how the crepes turn out.
How much should you stir the batter? Stirring increases gluten formation. When you're making the batter, mix just enough to make it smooth.
Frying crepes one by one takes time. As the batter sits, the flour in the mixture sinks to the bottom of the bowl. To keep it evenly mixed, remember to stir now and then. Otherwise, crepes made with thinner batter will tear. And crepes made with thicker batter will be rubbery.
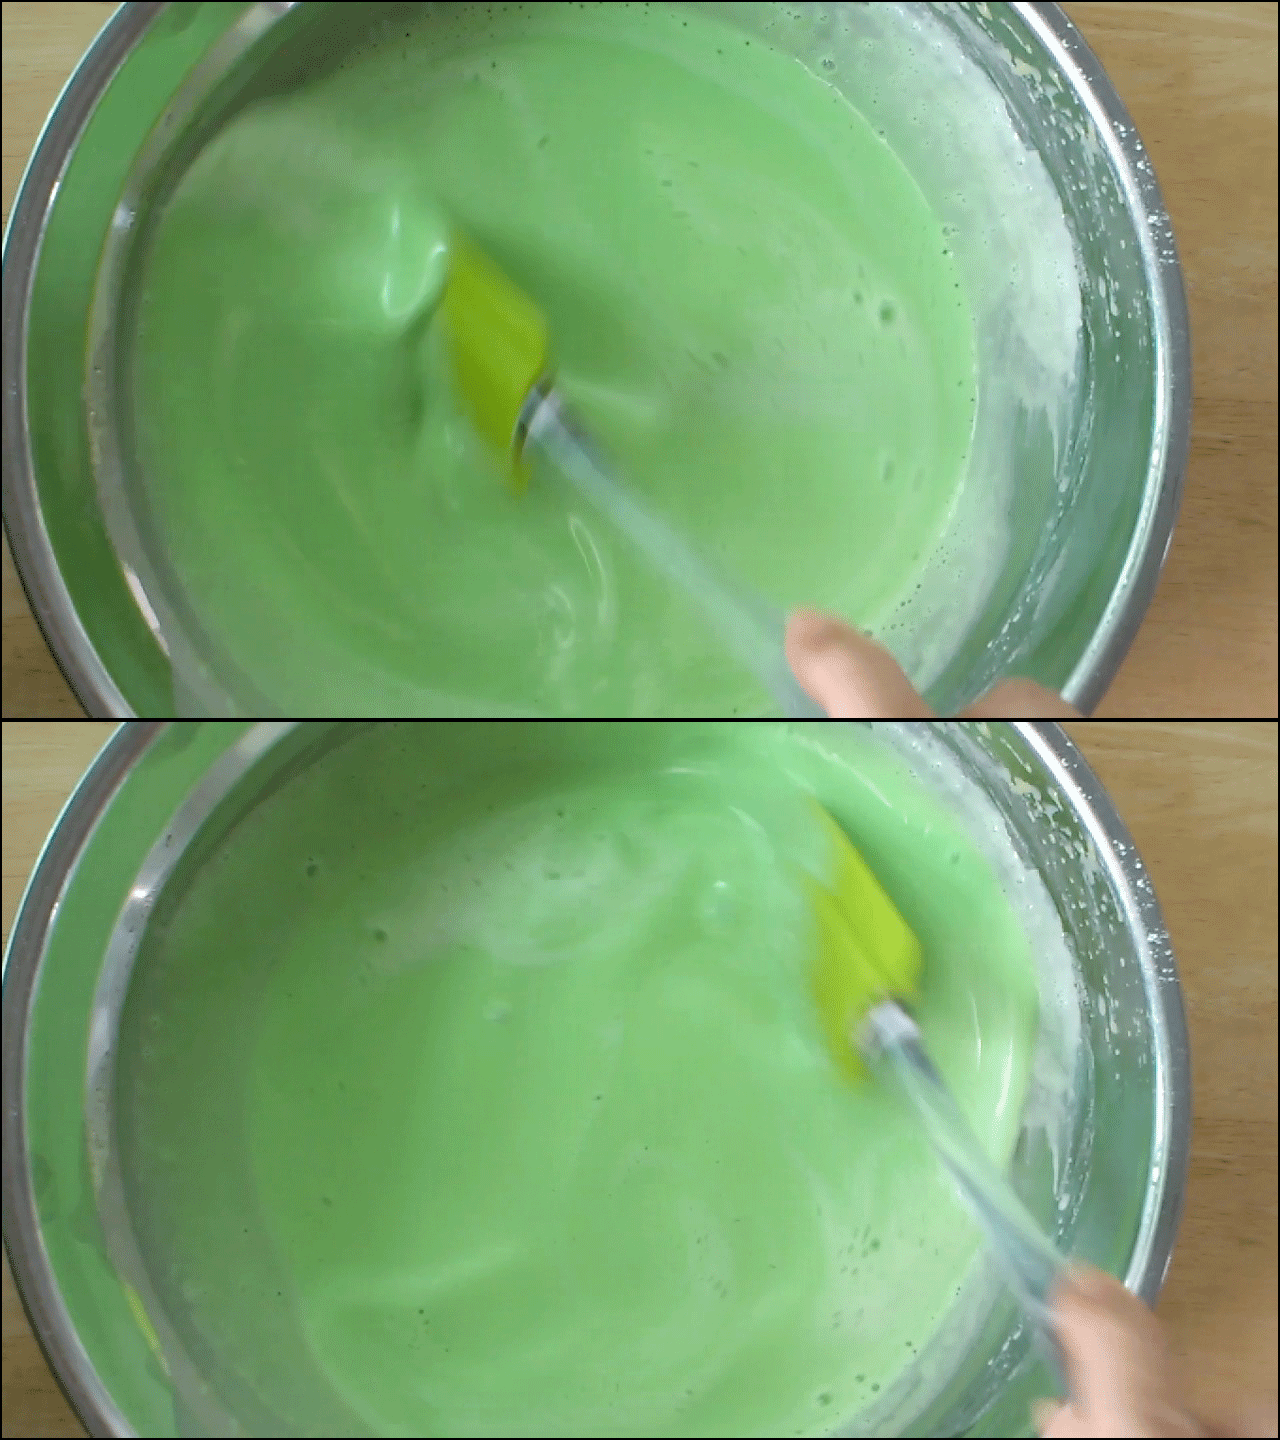
Most crepe recipes tell you to sieve the batter, and let it rest before frying. That's because there's a lot of flour in these recipes. Sieving reduces the amount of flour, because some of it sticks to the sieve. And resting relaxes the gluten. Without these two steps, the crepes would be rubbery.
My recipe is different from others. It has far less flour. The batter would have too little flour, and the gluten would be too weak if it's sieved and rested. That would make crepes that tear easily.
If you want crepes that have the right texture, flavour and look, getting the batter right isn't enough. You must also get the heat right.
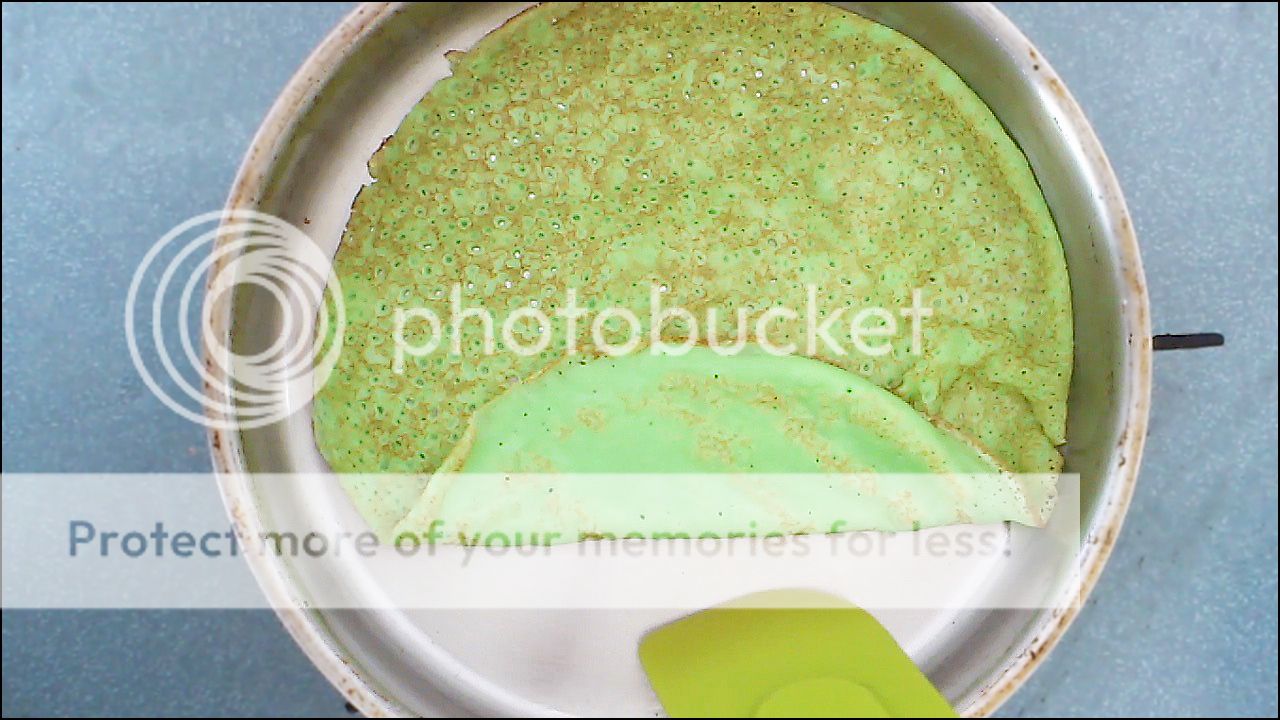
The pan must be hot enough. Why? Because heat turns the water in eggs and milk into steam, which makes the crepes puff up. When crepes puff up more, they're softer.
Heat is also needed to turn crepes brown. The browning gives crepes a lacy look, and it enhances the fragrance of the crepes.
The frying pan mustn't be too hot either. If it is, the batter sets once it hits the pan, and the crepe would be too thick. Thick crepes are tough. When the pan isn't too hot, there's time to swirl the batter into a thin layer before it sets. Good crepes are just thick enough to flip without breaking.
Turning a pile of crepes into mille crepe cake takes a lot of filling. If I fill my mille crepe cake with only whipped cream, that's way too rich for me.
I need to lighten whipped cream with something. Pastry cream? Too much work. Durian? The fridge will smell for days. Strawberries? Too hard. Mangoes? Hey, bingo!
Sweet and soft, mangoes go well with crepes and cream in both flavour and texture. The cheerful yellow doesn't hurt either. Who doesn't like colourful food?
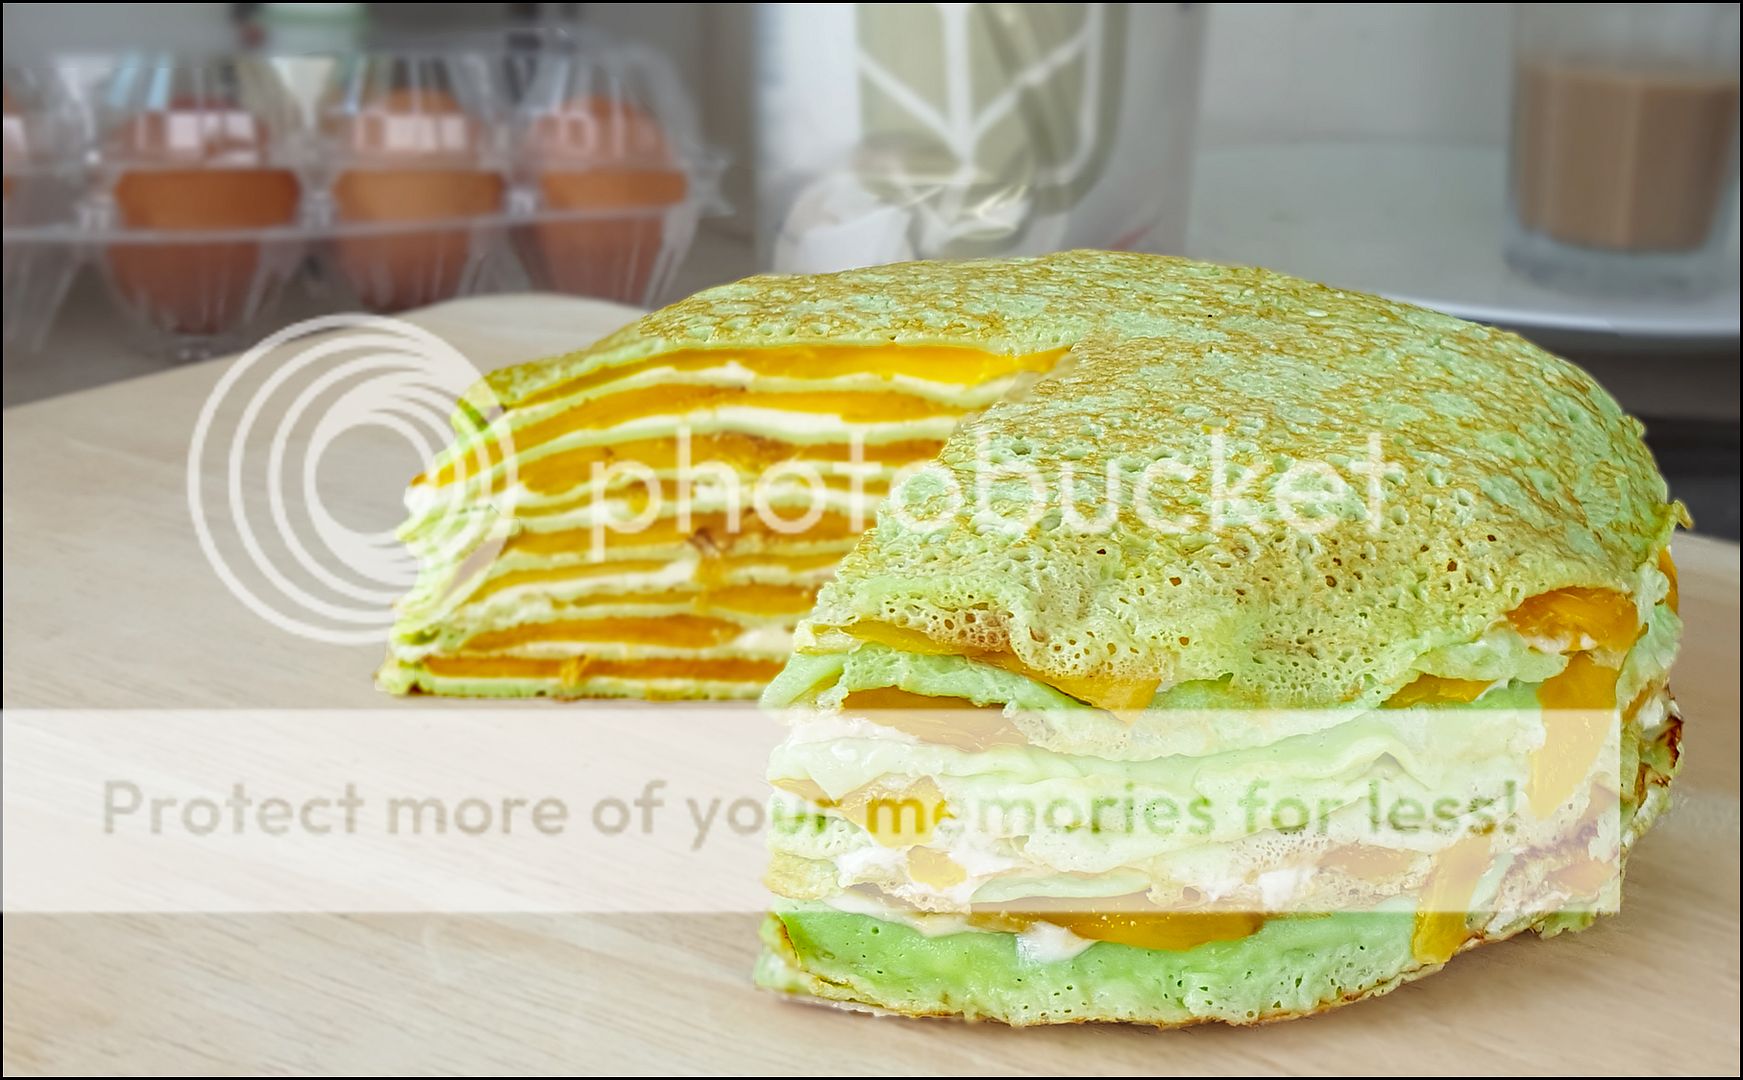
Most people make about 20 crepes for their mille crepe cake. I do only 11. Why? Because I have a layer of mango between each crepe. That's adding 10 layers in total, so my cake isn't short at all.
Here's how I make my sunny, cheerful, and delicious mango mille crepe cake:
MANGO MILLE CREPE CAKE (芒果千层可丽饼蛋糕)
(Recipe for one 16 cm cake)
Crepes (makes 11 pieces using 18 cm frying pan) 30 g sugar 100 g eggs 15 g egg yolk 30 g corn oil 60 g plain flour 200 g full-fat milk 1/4 tsp pandan paste
lard for greasing steel pan
or corn oil if using non-stick
Filling 200 g dairy cream with 35% fat, cold 30 g sugar 1/4 tsp vanilla extract 3 mangoes, each about 250 g
To make crepes 1) Mix sugar with eggs, yolk and corn oil till dissolved. Sift plain flour into mixture. Mix till even and smooth. Add half of full-fat milk. Mix till even and smooth. Add remaining milk. Mix till even and smooth.
2) Heat 18 cm frying pan over medium-low heat till medium-hot (125-130ºC). Reduce heat to low. Grease pan lightly.
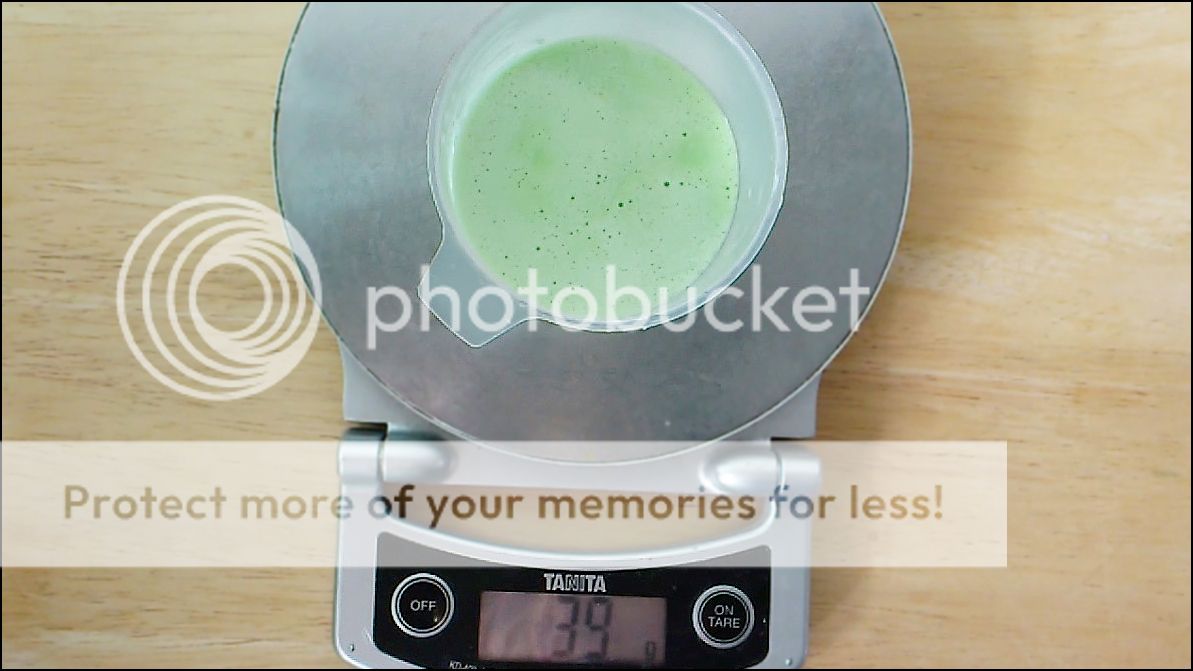
3) Measure 39 g batter into cup. Pour into middle of pan. Swirl quickly to form even layer. Measure another 39 g batter into cup. Set aside. When crepe turns slightly brown around edges (takes about 30 seconds), loosen and flip with flexible spatula. Fry till second side is slightly brown (about 20 seconds). Remove crepe to plate. Repeat frying as before, making 11 crepes in total. Whilst frying, mix batter gently once per batch of 3-4 crepes.
4) Leave crepes till cool. Refrigerate till thoroughly chilled.
To make filling 5) Whip dairy cream with sugar till thick. Add vanilla extract. Whip till cream is just stiff enough to stick to whisk. Place cream in fridge.
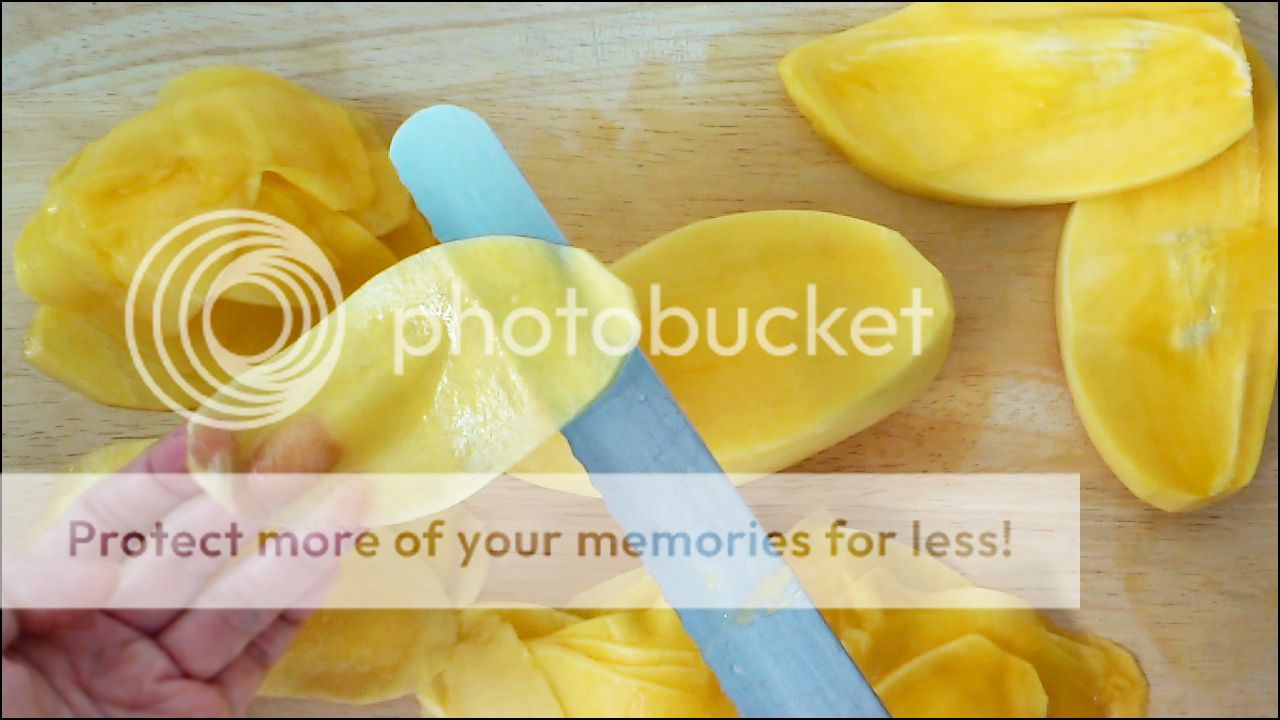
6) Peel mangoes. Cut into 1 mm thick slices. Discard peel and seeds.
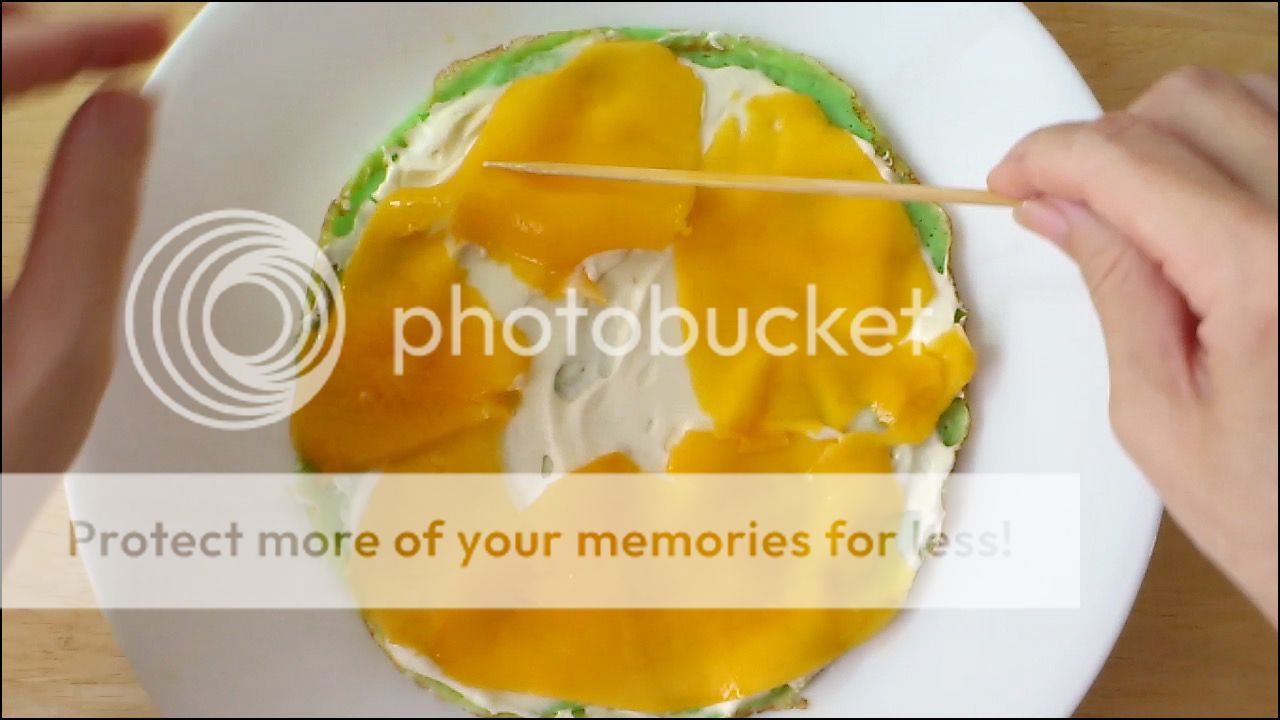
To assemble cake 7) Place 1 crepe on serving plate. Spread with 23 g whipped cream. Top with mangoes. Place another crepe on mango layer and repeat layering as before, making sure cake isn't lopsided.
8) Gently press top of cake with bottom of cake pan. Cover cake with pan. Refrigerate for about 12 hours. Serve.
This is another Swiss roll post, the third on this blog. My matcha sheet cake is barely sweet, to keep it in character with green tea which is drunk without sugar. It has quite little oil because matcha doesn't absorb much oil. My vanilla sheet cake, in comparison, has twice as much. Green tea powder also helps "lighten" the cake. You know how tea makes food seem less rich? Matcha does that with cake.
If you don't know much about matcha, please read my post on matcha layer cake. You'll find information on what type of matcha to buy and how to store it.
My matcha sheet cake uses the chiffon method. Making the batter is quite easy. Just do the usual stuff that applies to all cakes, e.g. measuring the ingredients correctly, not over- or underbeating, not over- or undermixing, etc.
The baking part is less straightforward. When I bake the cake, I block the oven's bottom heat around two-thirds of the way. Why? To keep the inside of the cake moist whilst allowing the crust to dry out sufficiently. Without blocking the bottom heat, the crust would be sticky when the inside is just right. And if the bottom heat is blocked too early, the bottom of the cake would stick to the parchment paper.
What makes the crust dry out slowly? Matcha. Some of the fine powder rises to the top of the cake when heated. Do wet leaves dry well in the oven? No, not as well as flour which has starch to help it set. That's why the crust needs the tray's help.
I like to fill my matcha roll with matcha whipped cream and red beans. You can, of course, make sweetened red beans from scratch. But chances are your homemade version won't be as fragrant as Japanese canned red beans unless your beans are from Hokkaido. Chinese red beans are far inferior.
I've tried two brands of red beans: Hashimoto and Imuraya. Both are fragrant but I prefer Hashimoto. It has more bite and is less sweet.
Imuraya beans are mushy and the syrup, because it's thickened with cornstarch, is very gloopy. The gloop clings to the beans, adding to the sweetness and mushiness. Unlike Imuraya, Hashimoto is thickened with sorbitol. The syrup isn't as thick at room temperature, so I can drain it.
One small can of Hashimoto, 190 g, yields 130 g after it's drained. Leftovers may be refrigerated for a few weeks or frozen for a few months.
I like my matcha roll "naked", i.e. it's rolled inside out and there's no icing. I think the green, spongy look is quite pretty. Is rolling the cake difficult? Not at all. The cake handles well (provided it's made right). If you don't know much about rolling Swiss rolls, please read my post on vanilla Swiss roll.
After you make the Swiss roll, have a small piece to see what it's like. Take note of the taste and remember it. Keep the rest of the roll in the fridge, covered, for two days. Your saintly patience will be rewarded with a matcha flavour that's more intense than two days prior, and melded with the red beans. After taking a bite, you'll never again eat matcha Swiss roll that's freshly made . . . or store-bought.
Here's my video to walk you through the recipe:
MATCHA SWISS ROLL (抹茶瑞士蛋糕卷)
(Recipe for one small roll)
Cake 10 g very hot water 1/2 tbsp green tea powder
30 g egg yolks 10 g castor sugar 15 g corn oil 15 g cake flour
70 g egg whites 1/16 tsp cream of tartar 20 g castor sugar
soft butter for greasing pan Filling 75 g fresh dairy cream, 35% fat 1/2 tsp green tea powder 40 g drained red beans, Hashimoto brand (beans need at least 30 min to drain well)
If you double the recipe, use a 13" x 10" pan.
1. To make cake, preheat oven to 200°C. Grease 10" x 7" cake pan with butter. Line with 14" x 7" parchment paper, making sure paper has no air pockets or creases. Measure and prep ingredients as detailed above.
2. Add water to green tea powder. Stir till smooth. Cover. Set aside.
3. Whisk egg yolks with 10 g castor sugar till thick and pale. Add corn oil. Whisk till thick. Add green tea paste. Mix till even. Sift cake flour into mixture in 2 batches. Mix till just even after each batch.
4. Whisk egg whites on medium-low speed till very frothy. Add cream of tartar. Whisk till thick foam forms. Gradually add 20 g castor sugar whilst continuing to whisk. Reduce speed to low. Keep whisking till firm, hooked peak stage.
5. Loosen egg yolk mixture from bottom of bowl. Add egg whites in 2 batches. Mix with whisk till almost even after each batch. Scrape down and fold with spatula till just evenly mixed, banging bowl against worktop 2-3 times.
6. Scrape batter into cake pan, slowly and from 1' high. Spread as evenly as possible. Jiggle vigorously till batter is level, banging cake pan against worktop 2-3 times.
7. Bake cake on middle shelf of oven till risen, about 9 minutes (10 minutes if recipe is doubled). Place baking tray in bottom of oven. Continue baking till crust is lightly brown and middle of cake doesn't make squishing sound when pressed, 4-5 minutes (5-6 minutes if recipe is doubled), checking once every 30-45 seconds towards the end.
8. Remove pan from oven. Drop from 1' high 2-3 times. Loosen cake with knife. Drag onto wire rack. Leave till cold. Remove from wire rack. Place new parchment paper on cake. Flip cake upside down. Peel old parchment paper from cake, slowly. Flip again.
9. To make filling, whip cream till thick enough to hold its shape. Add green tea powder. Whisk till thick enough to stick to whisk.
10. To assemble Swiss roll, spread cake with whipped cream, then red beans. Roll. Refrigerate for 2 days, covered. Remove from fridge. Cut with serrated knife, wiping knife clean after each cut. Tuck in when cake is soft but filling is still firm.
Tang mian is roux, made by cooking flour in bubbling hot butter.
Tang mian cake has the fluffiness of chiffon cake and the butteriness of butter cake. It has the best of two cake worlds but that's not all. It is smooth, smoother than chiffon or butter cake could ever be.
Some people call tang mian "cooked dough" instead of "roux". And the cake is sometimes called "黄金蛋糕" or "golden sponge cake". Hey, a rose by any other name . . . . Mixing bubbling hot butter with flour intensifies the butter aroma significantly. If butter were just melted and added to the batter, or it's just beaten till fluffy, the cake would taste less buttery. Even beurre noisette isn't as good.
Cooking flour in hot butter makes the cake smooth. Why? Because when flour is coated with fat, it doesn't form gluten when it's mixed with non-fat liquids. No gluten is good news for cakes because gluten has a rough texture. In fact, pure gluten looks quite like sea sponge.
Once the roux is made, it's transferred into a bowl and mixed with cold milk. The milk is absorbed by the starch in the flour, creating a thick paste that's very hot. Unlike gluten which is rough, thickened starch has a smooth texture. That's why tang mian cake is smoother than other types of cake (when it's done right).
After the edge of the heat cools down, a small amount of egg white is added to the thick paste. When this is done is critical to the success of the cake. Why? Because the timing affects the consistency of the starch. If the starch is too thick/thin, the cake won't rise well. If the starch is just right, the cake will be very smooth. You know how good wine feels smooth in the mouth? Hey, cake can be smooth too!
After combining the roux with egg white, along with vanilla extract and salt, I add egg yolks. These are added one at a time so that they are mixed but not emulsified with the starch. The yolk batter mustn't stick to the whisk. Otherwise, it's too thick and the cake is doomed.
The bulk of the egg whites in the recipe are whisked, separately with sugar and cream of tartar, till firm peak stage.
If the batter is bubbly after whisked egg whites are added to the yolk mixture, it's too thin. Thin batter allows air bubbles to escape easily, so the cake won't rise well. It also allows air bubbles to expand easily when heated, so the cake will be pockmarked.
The batter is poured into the cake pan, slowly and from about 30 cm high. This releases big air bubbles in the batter, so the crumb will be fine and smooth.
If the batter falls in clumps when it's poured, it's too thick. Big air bubbles remain trapped in the batter, turning into unsightly holes in the cake when the baking is done. If the batter is too thick to rise well, the cake will be short and dense.
What makes the batter too thick? The roux is too hot when egg white is added, or the meringue is overwhisked. And vice versa would make the batter too thin.
After baking, the cake must be inverted whilst it's cooling down. If it's underbaked, it'll fall out of the pan and you can wave goodbye to its fluffiness. If the cake is overbaked, it'll be too dry. When the cake is baked just right, it's delightfully moist and fluffy . . . . Oh hang on . . . I think there's someone at the door.
Want to get the timing right so that your cake is fluffy, moist, smooth and buttery? Here's how:
MARBLE BUTTER SPONGE CAKE (TANG MIAN METHOD)
(Recipe for one 18 cm cake)
60 g unsalted butter 45 g cake flour 30 g full-fat milk, cold 20 g egg white 1 tsp vanilla extract 1/16 tsp salt 45 g egg yolks
105 g egg whites 1/16 tsp cream of tartar 50 g castor sugar
1. Preheat oven to 160°C. Measure and prep ingredients as detailed above. Line bottom of 18 x 6 cm round cake pan with 2 layers of parchment paper.
2. Cook butter over medium-low heat, stirring with whisk, till just bubbling thoroughly. Turn off heat. (If your stove is electric, remove pan from stove.)
3. Add cake flour to butter. Stir till smooth. Transfer into mixing bowl with scraper. Add milk. Mix vigorously with whisk till just combined.
4. Feel sides of bowl, which should be very hot. Wait till edge of heat eases, about 30 seconds. Add vanilla extract, salt and 20 g egg white. Whisk till combined. Add egg yolks in 3 batches. Whisk till combined after each addition.
5. Whisk 105 g egg whites on medium-low speed till frothy. Add cream of tartar. Whisk till thick foam forms. Gradually add castor sugar, still whisking. Continue to whisk till soft peak stage. Reduce speed to low. Whisk till firm peak stage (i.e. peak is hooked).
6. Yolk mixture is now slightly bubbly. Stir with whisk to remove bubbles. Add egg whites in 3 batches. Mix with whisk till almost even after each addition. Scrape down and fold with spatula till just even, banging mixing bowl against worktop 2-3 times.
7. Transfer 20 g batter into small bowl. Add 1 tsp cocoa powder. Mix thoroughly.
8. Pour remaining batter into cake pan in 3 batches, slowly and from 30 cm high. After each batch, dot with cocoa batter and drag sharp end of skewer through dots. Jiggle batter till level, tapping pan against worktop 3-4 times.
9. Bake cake in bottom of oven till batter doesn't jiggle when shaken, 22-23 minutes. Move pan to lower-middle shelf. Increase temperature to 180°C. Bake till middle of cake doesn't make squishing sound when pressed, about 10-12 minutes.
10. Remove cake from oven. Leave on wire rack, inverted, till cool. Knock sides of pan till cake is loosened. Invert and remove pan. Invert cake right way up. Cut and serve.
If you've never made Swiss roll before, or never made one successfully, please don't try my chocolate Swiss roll recipe.
Making chocolate Swiss roll is a bit tricky. Why? Because cocoa powder complicates things. If you want a straightforward recipe, go for vanilla roll. That's almost idiot-proof (not that idiots are the lowest common denominator).
Cocoa powder makes the cake less stretchable, so you have to be careful not to overbake the cake. Even slight overbaking makes the cake crack when you roll it. Cocoa powder also makes the crust sticky, so you have to be careful not to underbake the cake. The more underbaked the crust is, the stickier it is.
The cake is perfectly done when it just turns springy in the middle. After it's cooled down, the crust should be a bit sticky around the edges. That's OK because the ends will be trimmed, or tucked inside/below after the cake is rolled.
If the entire crust isn't sticky, that's not a good thing at all. The cake is too dry and will likely crack when you roll it.
If the entire crust is sticky, it's gonna stick to whatever it rests on. Of course, that's not a problem if you ice the cake. Or if you go for the skinless look and roll the cake inside out.
Even when you've got the cake baked just right, you may still have a problem when you're rolling the cake. Why? Because the crust doesn't really stick to the crumb, so it comes off very easily. The loose crust is caused by cocoa powder which, as I said, complicates things.
Chocolate cakes have haphephobia (fear of being touched). Direct contact with the crust must be minimized if you don't want to damage it. How? Like this:
⋈ Put the cake on a piece of parchment paper, face down. Spread with whatever filling you like.
⋈ Start rolling the cake by making a fold in the cake. The fold must be very small, or the cake will be oval instead of round after rolling.
⋈ After the first fold is tucked in tightly, lift and tilt the parchment paper with your left hand (if you're right-handed). As the cake moves forward, it may bulge here and there. Gently flatten the bulges with your right hand so that the roll is tight and even. If you're making a very long roll, you'd need a rolling pin (or the core of your parchment paper or aluminium foil) to do this.
Because the cake doesn't handle well, it cracks (when you roll it) if it's too thick. And if it's too thin, the inside may be too dry when the crust is just right. Hence, you must scale the recipe according to your pan size. You don't want too little or too much batter in the pan.
Why make such a fuss over a cake? Why not just let it crack? You can hide the cracks with icing, icing sugar, chocolate rice/shavings, nuts, whatever. Nobody would know, right?
Yup, covering up is an easy way out. But you'd have bought a chocolate Swiss roll if you had wanted the easy way out. Or at least made a Swiss roll without cocoa powder. Or just eat the bloomin' cake without rolling it!
For those who want to make a good but uncomplicated Swiss roll, click here for my vanilla recipe. For those who want to make a chocolate roll for the sake of making it, because eating is only half the fun:
CHOCOLATE SWISS ROLL (巧克力瑞士蛋糕卷) (Recipe for one 12" roll)
15 g corn oil 10 g alkalized cocoa powder, Green & Black's brand 15 g castor sugar 10 g water pinch salt 1/2 tsp vanilla extract 30 g egg yolks 15 g cake flour
70 g egg whites 30 g castor sugar
75 g whipped cream
If you double the recipe, you need a pan that's 18"x 12".
1. To make cake, preheat oven to 200°C. Measure and prep ingredients as detailed above. Grease 12" x 9" pan with butter. Line pan with 12" x 12" parchment paper.
2. Heat oil till hot but not smoking (if you put your hand near the oil, you should feel searing heat). Add to cocoa powder. Whisk thoroughly. Add 15 g castor sugar. Whisk thoroughly. Add water. Whisk till thick paste forms. Add salt, vanilla extract and egg yolks. Whisk till sugar dissolves. Sift half of cake flour into mixture. Mix with whisk till even. Sift remaining cake flour into mixture. Mix with whisk till even.
3. Whisk egg whites on medium-slow speed till thick foam forms. Gradually add 30 g castor sugar whilst continuing to whisk. Keep whisking till egg whites are at soft peak stage. Reduce speed to slow and continue to whisk till firm peak stage (when whisk is lifted, egg whites form peak that's hooked).
4. Loosen egg yolk mixture from bottom of mixing bowl with whisk. Add egg whites in 2 batches. Mix with whisk after each addition till batter looks even. Scrape down and fold with spatula till batter is truly even.
5. Pour batter into cake pan. Spread with spatula as evenly as possible, pushing batter into corners of pan. Jiggle vigorously till batter is level. Tap pan against worktop twice.
6. Bake cake on middle shelf till middle of cake is springy when pressed, about 10 minutes. Remove from oven. Drop pan from 1' high 3-4 times. Unmould cake onto wire rack. Peel parchment paper from sides of cake. Leave till cool.
7. To assemble Swiss roll, place cake on clean parchment paper, face down. Peel parchment paper from bottom of cake. Spread evenly with whipped cream. Roll cake as shown in video. Do not remove parchment paper till cake is transferred to serving plate (so that cake may be moved easily without touching the crust).
8. To cut Swiss roll neatly, chill till filling is set. Cut with serrated knife, wiping knife clean with paper towels after each cut. Transfer to serving plate. Discard parchment paper.
9. To store overnight, place Swiss roll in cake pan. Place pan in plastic bag, making sure bag doesn't touch Swiss roll. Refrigerate. Remove from fridge about 15 minutes before serving. Cut immediately. Transfer to serving plate. Discard parchment paper. Serve when cake is soft but filling is still cold.
 吉利丁是什么?吉利丁=gelatine=明膠=鱼膠。
 吉利丁粉怎么软化?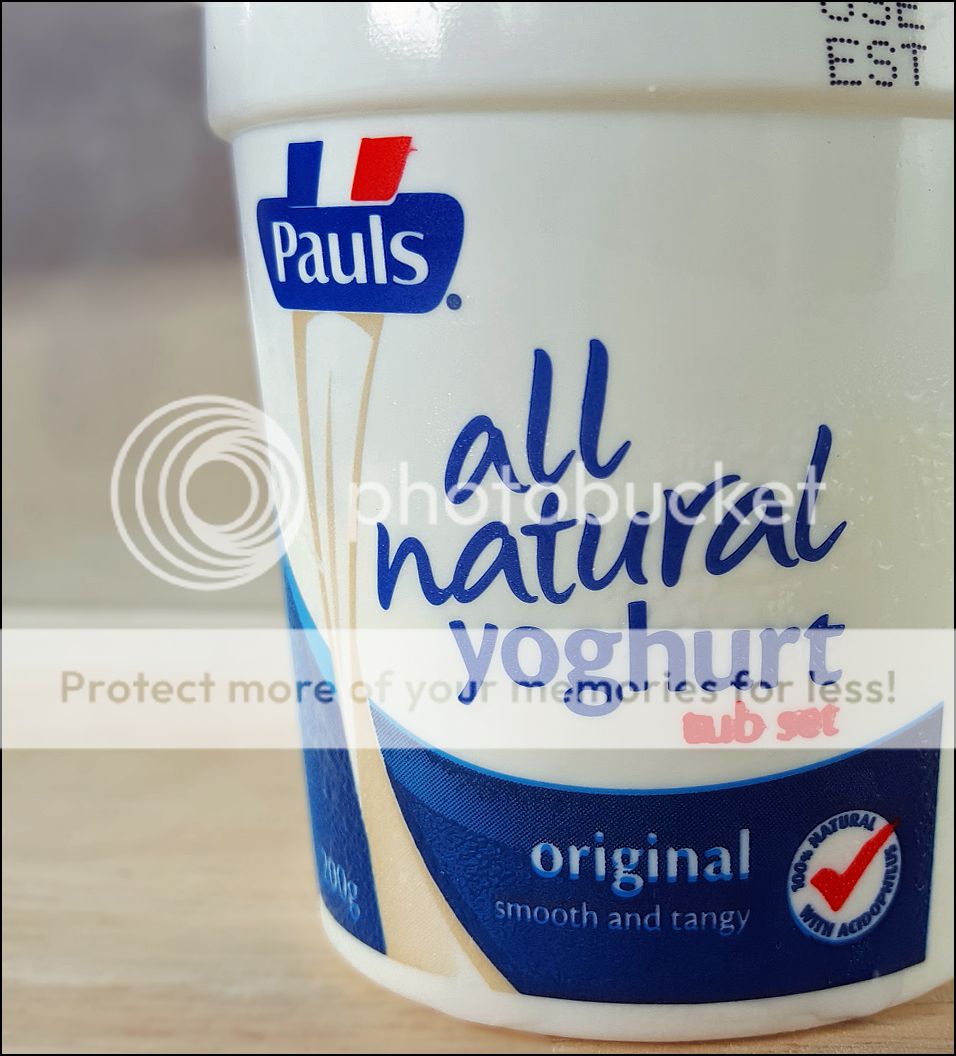
 免烤奥利奥芝士蛋糕
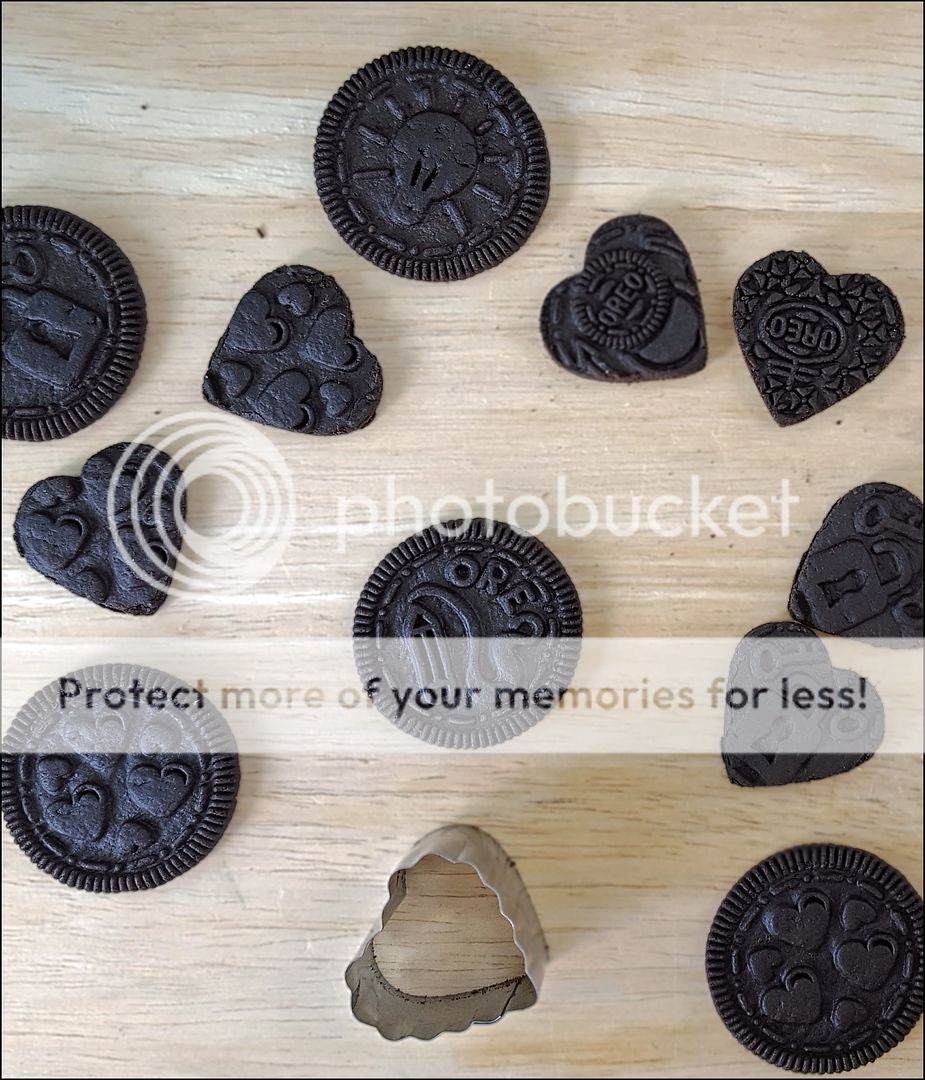 3)装饰做法:用心形模把饼干切成心形,9 个 3 cm,8 个 2 cm。
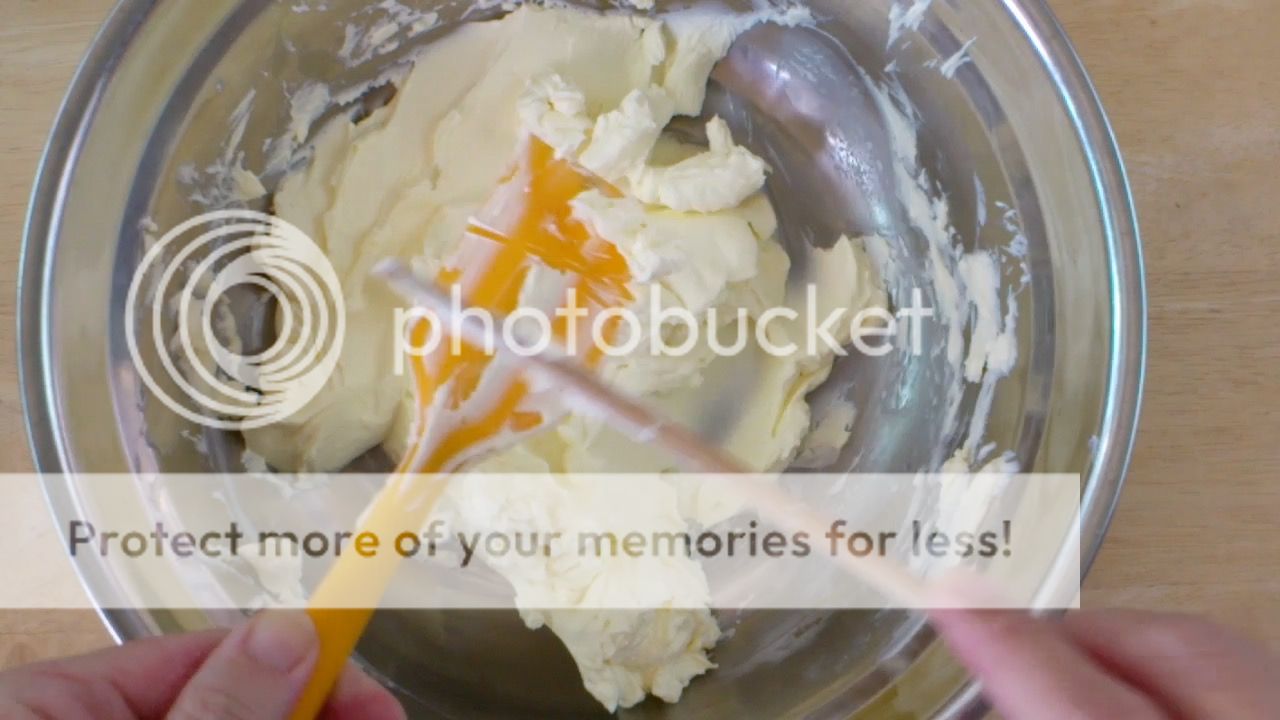 Cream cheese turns watery when it's mixed too much. The change is irreversible.
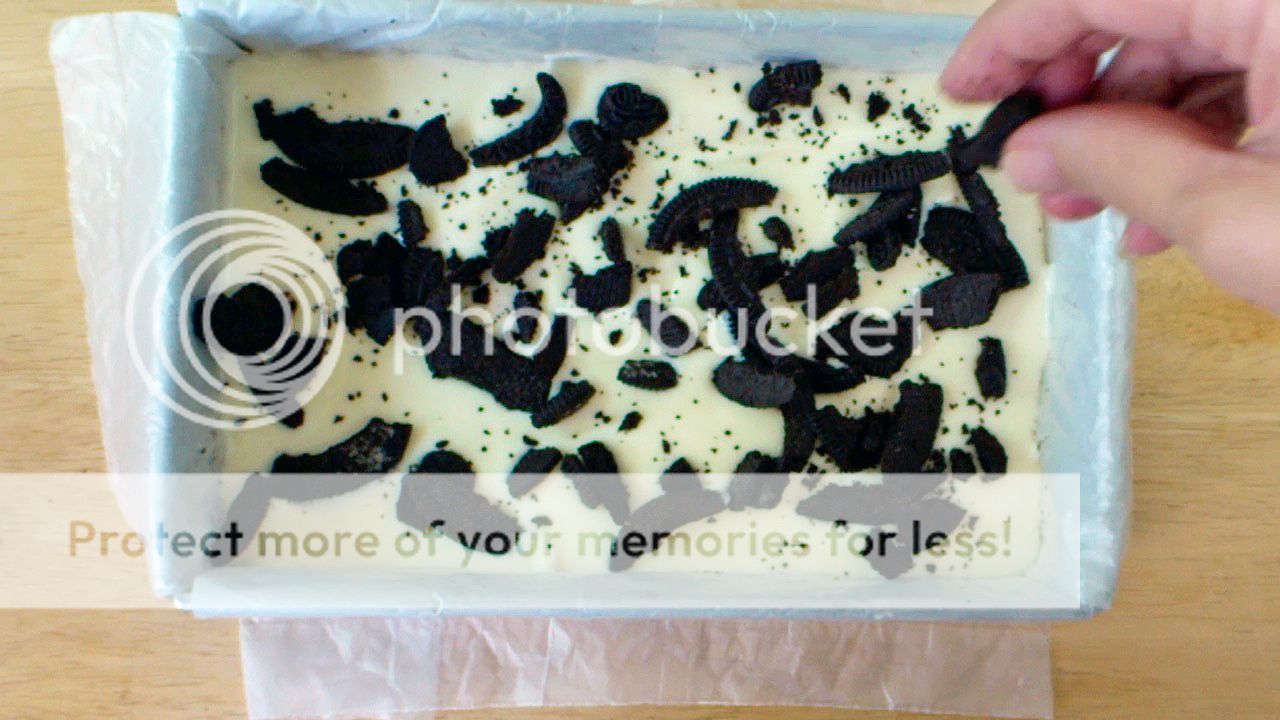 There're broken Oreo pieces in my cheesecake. I scatter the cookies between 3 layers of cream cheese mixture.
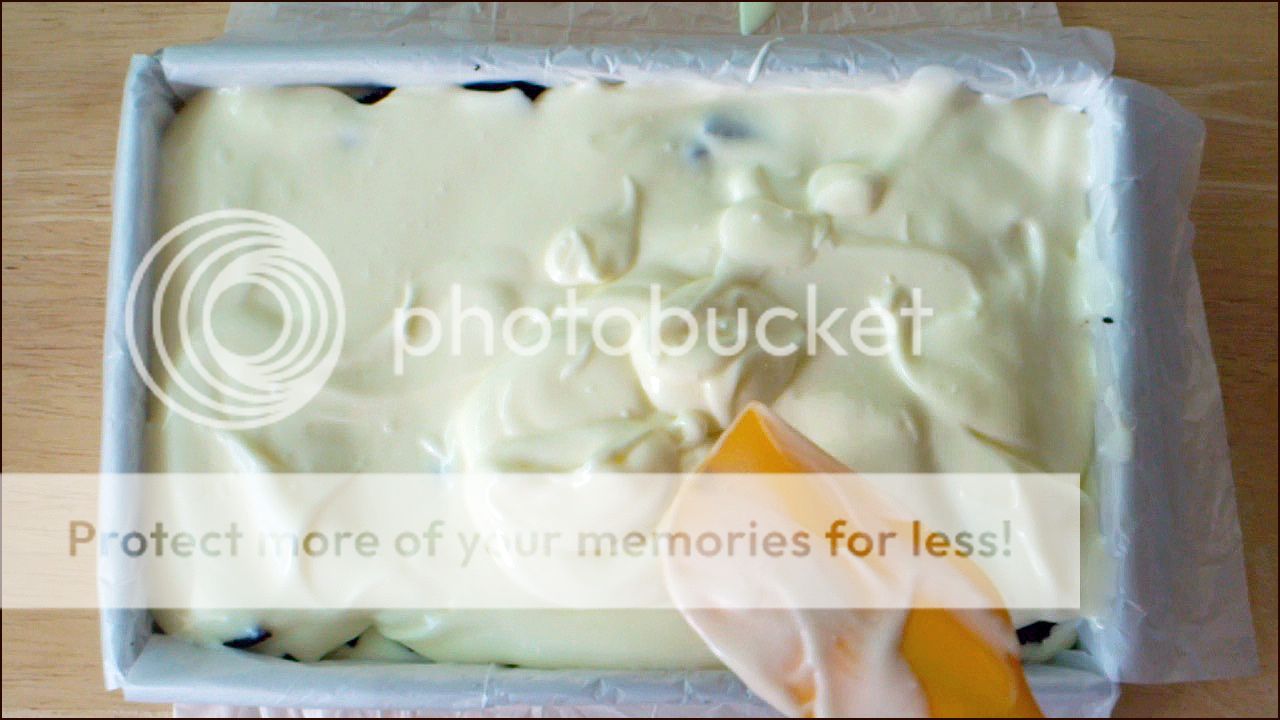 What's the right consistency? If the cream cheese mixture is level – like water – after it's poured, it's too thin. If it isn't level, but it is after you shake it, that's just right.
 Cheesecake crust is made with cookie crumbs and butter. Some people melt their butter before whizzing it with cookies in a food processor. That's not necessary at all. Food processors can pulverise solid butter in seconds. Melt the butter only if you're crushing and mixing by hand.
 The amount of gelatine powder for replacing 3 gelatine leaves varies with the powder's Bloom number:
 (Recipe for one 8" x 5" x 2" cake)
 8) Pour almost 1/3 of cream cheese mixture into cake pan. Sprinkle with half of cookies. Repeat layering as before. Finish with layer of cream cheese mixture. Bang cake pan against worktop 3-4 times. Cover and refrigerate till filling is set, about 8 hours. Keep chilled till serving time.
 Crepes may be tough and rubbery. Or they may be soft and delicate, that they fall apart in the pan when you flip them.
 flour. Some flours have more protein; some have less.
 Most crepe recipes tell you to sieve the batter, and let it rest before frying. That's because there's a lot of flour in these recipes. Sieving reduces the amount of flour, because some of it sticks to the sieve. And resting relaxes the gluten. Without these two steps, the crepes would be rubbery.
 makes the crepes puff up. When crepes puff up more, they're softer.
 I need to lighten whipped cream with something. Pastry cream? Too much work. Durian? The fridge will smell for days. Strawberries? Too hard. Mangoes? Hey, bingo!
 30 g sugar
 2) Heat 18 cm frying pan over medium-low heat till medium-hot (125-130ºC). Reduce heat to low. Grease pan lightly.
 To make filling
 Knock, knock!
  tea powder also helps "lighten" the cake. You know how tea makes food seem less rich? Matcha does that with cake.


 70 g egg whites
 If you double the recipe, use a 13" x 10" pan.


 Tàng, 烫: scald.
 and added to the batter, or it's just beaten till fluffy, the cake would taste less buttery. Even beurre noisette isn't as good.
  After the edge of the heat cools down, a small amount of egg white is added to the thick paste. When this is done is critical to the success of the cake. Why? Because the timing affects the consistency of the starch. If the starch is too thick/thin, the cake won't rise well. If the starch is just right, the cake will be very smooth. You know how good wine feels smooth in the mouth? Hey, cake can be smooth too!
 The bulk of the egg whites in the recipe are whisked, separately with sugar and cream of tartar, till firm peak stage.
  turning into unsightly holes in the cake when the baking is done. If the batter is too thick to rise well, the cake will be short and dense.
 1/16 tsp salt
  Cook butter over medium-low heat, stirring with whisk, till just bubbling thoroughly. Turn off heat. (If your stove is electric, remove pan from stove.)
 Yolk mixture is now slightly bubbly. Stir with whisk to remove bubbles. Add egg whites in 3 batches. Mix with whisk till almost even after each addition. Scrape down and fold with spatula till just even, banging mixing bowl against worktop 2-3 times.
 Bake cake in bottom of oven till batter doesn't jiggle when shaken, 22-23 minutes. Move pan to lower-middle shelf. Increase temperature to 180°C. Bake till middle of cake doesn't make squishing sound when pressed, about 10-12 minutes.
 If you've never made Swiss roll before, or never made one successfully, please don't try my chocolate Swiss roll recipe.
 The cake is perfectly done when it just turns springy in the middle. After it's cooled down, the crust should be a bit sticky around the edges. That's OK because the ends will be trimmed, or tucked inside/below after the cake is rolled.
 cake. Why? Because the crust doesn't really stick to the crumb, so it comes off very easily. The loose crust is caused by cocoa powder which, as I said, complicates things.
 be oval instead of round after rolling.
  pan size. You don't want too little or too much batter in the pan.
 If you double the recipe, you need a pan that's 18"x 12".
  15 g castor sugar. Whisk thoroughly. Add water. Whisk till thick paste forms. Add salt, vanilla extract and egg yolks. Whisk till sugar dissolves. Sift half of cake flour into mixture. Mix with whisk till even. Sift remaining cake flour into mixture. Mix with whisk till even.
  Loosen egg yolk mixture from bottom of mixing bowl with whisk. Add egg whites in 2 batches. Mix with whisk after each addition till batter looks even. Scrape down and fold with spatula till batter is truly even.
  7. To assemble Swiss roll, place cake on clean parchment paper, face down. Peel parchment paper from bottom of cake. Spread evenly with whipped cream. Roll cake as shown in video. Do not remove parchment paper till cake is transferred to serving plate (so that cake may be moved easily without touching the crust).